Visual Scripting Overview
StoryFlow Editor uses a visual scripting system (also referred to as the node editor) - a powerful no-code interface for building interactive stories. Learn how to navigate and use it effectively.
Visual Scripting Interface
The visual scripting system (also referred to as the node editor) is a workspace where you build interactive stories by connecting nodes together - no programming required. Instead of writing code, you create logic flows, dialogue branches, and complex behaviors by dragging nodes onto a canvas and connecting them visually. The interface uses a resizable multi-panel layout that adapts to your workflow, with dedicated areas for editing, variables, and content management.
Main Interface Components:
- Top Menubar: File operations (Save, Save All, Show in Content Browser) and Help menu
- Center Toolbar: Save, Play/Stop buttons, Settings (canvas and editor options), and Export options
- File Tabs: Horizontal tabs showing all open files. Drag to reorder, click X to close. Changed files show an amber indicator
- Variables Panel (Left): Lists all variables for the current script (all types including arrays and maps). Drag variables to canvas to create Get/Set nodes. Collapsible.
- Flows Panel (Left): Lists all flows defined in the current script. Click to jump to Entry Flow nodes. Collapsible.
- Canvas (Center): The main editing area where you create and connect nodes to build your story flow
- Right Sidebar: Contextual panels including Dialogue Editor and Variable Edit Panel. Appears when editing nodes or variables
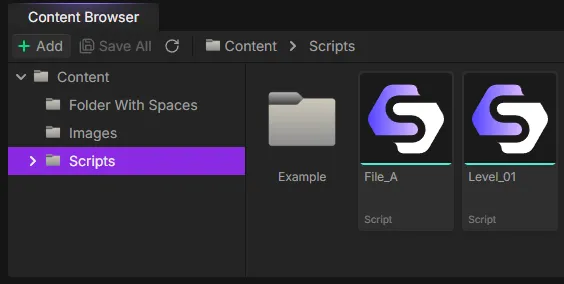
- Content Browser (Bottom): File explorer for your project. Create folders and scripts, drag images to dialogue editor. Collapsible with minimized bar.
Resizable Panels
All panels can be resized by dragging the borders between them. The editor remembers your layout preferences. Collapse panels you don't need to maximize your canvas space.
Navigation Controls
The canvas provides smooth navigation controls to help you work with stories of any size. Whether you have 10 nodes or 1,000, these controls make it easy to move around and stay organized.
Canvas Navigation:
- Pan (Move): Click and drag on empty canvas area to move your view around
- Zoom: Use your mouse wheel to zoom in and out. The zoom level is displayed in the top-right corner
- Fit View: Click the fullscreen icon button (top-right) to center your view on the Start node
- Minimap: Enable the minimap via Settings (gear icon, top-right) for a bird's-eye view of your entire story. Click nodes in the minimap to jump to them
Node Selection:
- Select Single Node: Left-click on any node to select it
- Multi-select: Hold Ctrl and click nodes to add them to your selection
- Box Select: Click and drag on empty canvas to draw a selection box around multiple nodes
- Deselect All: Click on empty canvas area
Canvas Controls (Top-Right):
- Zoom Indicator: Shows current zoom percentage (e.g., "100%")
- Fit View Button: Centers view on your Start node
- Settings Button: Opens a dropdown with canvas and editor options including Show Minimap, Snap to Grid, Background Style, Edge Type, Spellcheck, and Auto-label Buttons
Tip: Viewport Memory
The editor remembers your zoom level and pan position for each script file. When you switch between files using the tabs, your viewport position is automatically restored.
Adding Nodes
Visual scripting in StoryFlow is built around adding and connecting nodes. Each node represents a specific action or logic operation, and connecting them together creates your story's behavior. StoryFlow Editor provides two methods for creating nodes: the context menu for browsing all available node types, and drag-and-drop from the Variables panel for creating variable nodes.
Using the Context Menu:
- Right-click on any empty area of the canvas
- The Node Creation Menu appears with all available node types
- Browse through categories or use the search bar at the top to filter nodes
- Use Arrow Up/Down to navigate items, Enter to select, or Escape to close
- Click on a node type to create it at the cursor position
Creating Nodes from Connections:
When you drag a connection from a node's output handle and release it on empty canvas space, the Node Creation Menu opens automatically. In this context, you'll see a Compatible checkbox at the top of the menu. When enabled (default), only nodes that can connect to that output type are shown - making it faster to find the right node.
Node Categories in the Menu:
- Flow Control: Start, Dialogue, Run Script, Entry Flow, Run Flow, Play Audio, Set Background Image, Branch, Random Branch, End, Comment
- Boolean Operations: Not, And, Or (yellow indicator)
- Integer Operations: Greater Than, Less Than, Plus, Minus (cyan indicator)
- Enum Operations: Equal Enum, Switch On Enum, type conversions
- Array Operations: Add, Remove, Get/Set Element, Length, Contains, For Each Loop
- Map Operations: Get Value, Set Value, Has Key, Size, Keys, Values, Remove Key, Clear, For Each
- Variables: Get and Set nodes for all variable types (primitives, enums, arrays, maps, assets)
Drag-and-Drop from Variables Panel:
- In the Variables panel (left sidebar), find the variable you want to use
- Drag the variable onto the canvas
- When you release, a menu appears asking if you want to create a Get or Set node
- Select your option and the node is created instantly
Search Tips
- ">" to find "Greater Than"
- "==" to find "Equal" nodes
- "+" to find "Plus"
- Variable names to quickly find Get/Set nodes
Canvas Editing
Beyond placing and connecting nodes, StoryFlow Editor gives you a few editing gestures for reshaping a graph you've already built - duplicating selections, nudging nodes into precise alignment, and controlling what stays selected after a duplicate. These work on the canvas you're currently hovering, so in a split view each canvas responds independently.
Duplicating Nodes
Select one or more nodes and press Ctrl + D (Cmd + D on macOS) to duplicate them. The copies appear slightly down and to the right of the originals, so the new nodes don't land exactly on top of the ones you copied. You can also right-click a node and choose Duplicate from the context menu - it produces the same result, and the menu shows the current shortcut next to the label.
- Edges between the selected nodes are copied along with them, so a duplicated branch keeps its internal wiring.
- The Start node can't be duplicated. If it's part of your selection it's simply skipped, and the offset is measured from the topmost-leftmost node that can be copied.
- Duplicating is a single undoable step - one
Ctrl + Zremoves the copies.
Duplicate vs. Copy and Paste
Ctrl + D duplicates in place with a fixed small offset, which is ideal for quickly repeating a node next to its original. Ctrl + C then Ctrl + V instead pastes at your mouse position, which is better when you want to drop the copy somewhere specific. Both honor the Selection After Duplicate behavior described below.
Nudging Nodes with Arrow Keys
With one or more nodes selected, the arrow keys nudge the whole selection in that direction. This is handy for fine alignment that's awkward to hit with the mouse, or for shifting nodes that are hard to reach.
- Arrow key: moves the selection by 10 units per press (one unit is roughly one screen pixel at 100% zoom).
- Shift + Arrow key: moves the selection by 50 units per press for larger jumps.
Nudging only fires while your mouse is over the canvas and nothing is selected in a text field, so arrow keys still move the cursor normally when you're typing in the Dialogue Editor or another input. If no nodes are selected, the arrow keys do nothing on the canvas.
Undo Groups Nudges Sensibly
A single tap of an arrow key is one undo step. Holding an arrow key to glide a node across the canvas collapses into a single undo step rather than dozens. Distinct taps each remain their own step, so you get granular undo exactly when you'd want it.
Selection After Duplicate
After you duplicate, which nodes end up selected is configurable. Open Settings → Script Editor and set Selection After Duplicate to one of:
- Extend Selection (default): both the originals and the new copies stay selected.
- Select Duplicates: only the new copies are selected; the originals are deselected.
- Keep Originals: only the originals stay selected; the copies are dropped from the selection.
This setting applies to both Ctrl + D and the right-click Duplicate command, so the behavior stays consistent across both ways of duplicating.
Keyboard Shortcuts
StoryFlow Editor includes standard keyboard shortcuts to speed up your workflow. Most use Ctrl (Cmd on macOS), and several can be remapped - see Rebinding Shortcuts below.
| Shortcut | Action | Notes |
|---|---|---|
Ctrl + S | Save active file | Works anywhere in the editor |
Ctrl + Z | Undo last action | Canvas must be focused |
Ctrl + Y | Redo action | Also: Ctrl + Shift + Z |
Ctrl + C | Copy selected nodes | Canvas must be focused |
Ctrl + V | Paste nodes at cursor | Pastes at mouse position |
Ctrl + D | Duplicate selected nodes | In place, with a small offset |
| Arrow keys | Nudge selected nodes | 10 units, or 50 with Shift |
Delete or Backspace | Delete selected nodes/edges | Canvas must be focused |
Focus Requirement
Most keyboard shortcuts only work when your mouse cursor is over the canvas. This prevents accidental edits while typing in text fields or the dialogue editor. The Save shortcut (Ctrl + S) works everywhere.
Rebinding Shortcuts
Many canvas shortcuts are remappable. Open Settings → Keybindings and look under the Script Editor Canvas group to change them. For example, both Duplicate Selection (Ctrl + D by default) and Delete Selection (Delete or Backspace by default) can be reassigned to chords that suit your workflow.
Not Everything Is Rebindable
Arrow-key nudging is a four-direction gesture rather than a single command, so it isn't listed in the Keybindings panel and can't be remapped.
Additional Tips:
- Double-click dialogue nodes to quickly open the Dialogue Editor
- Double-click edges (connection lines) to delete them instantly
- Drag file tabs to reorder your open files
- Click nodes in the minimap to quickly jump to different parts of your story
Next: Learn About Node Types
Now that you understand the interface, explore the Node Types Reference to learn about all 80+ node types and how to use them to build complex interactive stories. Also check out Flows for organizing reusable logic within scripts.